Create a VOD Encoding Job
This page explains how to use the V-Nova platform to create VOD assets.
Was this helpful?
This page explains how to use the V-Nova platform to create VOD assets.
Was this helpful?
The following sections describe the controls that can be set, to customize a VOD encode to your requirements.
To create a VOD Job:
Go to either Dashboard --> Total VOD Assets, or to Encode Jobs --> VOD. The Job List is displayed
Click the Start a new Job icon. The VOD Job page Content Information panel is displayed. The VOD Job Content Information panel contains five or six tabs depending on the user level, all of which contain configuration parameters:
General
Input
Profiles
Base Codec
LCEVC
Advanced (only when enabled by administrators)
The settings in each of the tabs are described in the following sections.
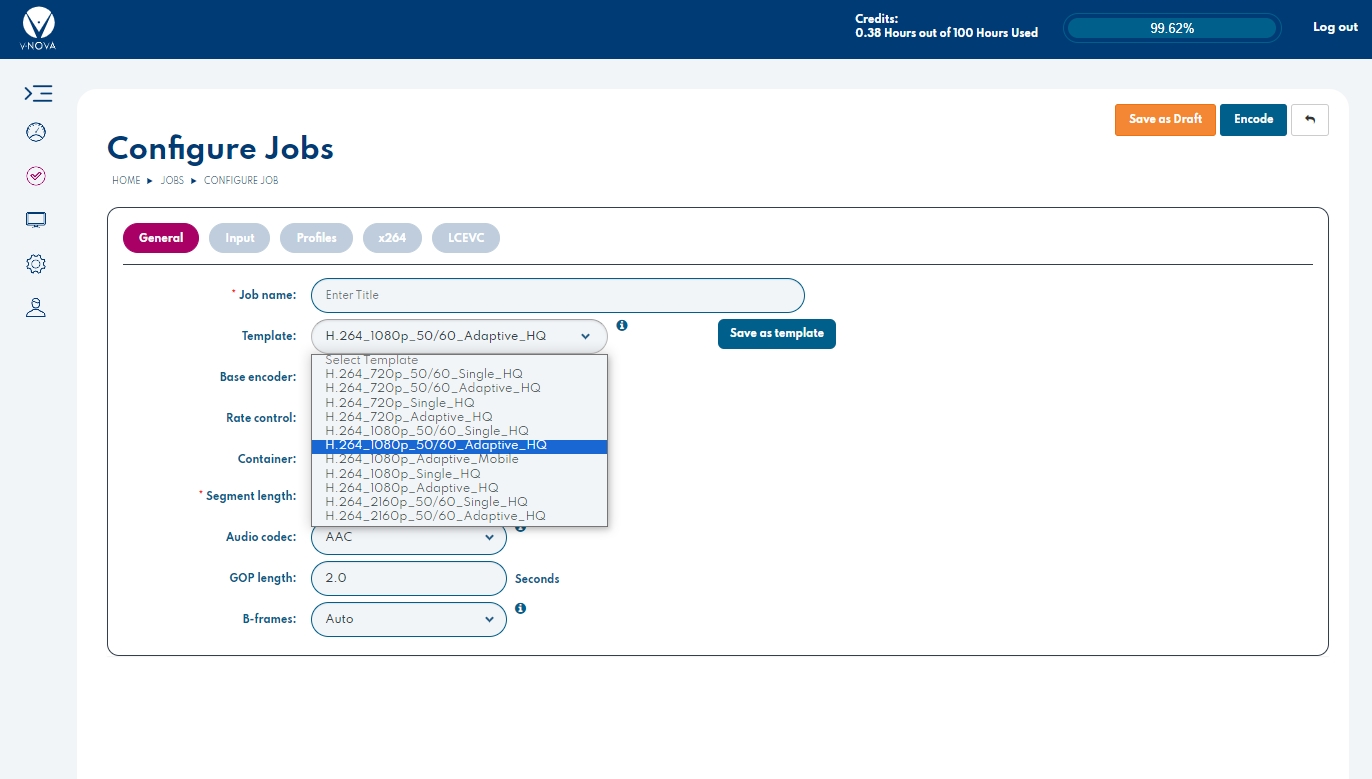
'The General tab includes the following fields:
Title (Mandatory): Enter title
Template: Load a pre-set template
Base encoder: Define base encoder to use
Rate Control: Define rate control method to use. Default is CBR.
Container: Select one of the following:
Fragmented MP4
TS Chunks
M4S (Live only)
Webm (only for VPX or AV1)
Segment length (Mandatory): Duration in seconds of packaged segments. Default value is 10.
Audio: Define Audio codec to be used. Default is AAC for H264/H265, Vorbis for VPX + AV1.
GOP: Define GOP (Group-of-pictures) in seconds. Default is 2.0 seconds.
B-frames: Define number of B-frames to be used (if relevant). Default is Auto.
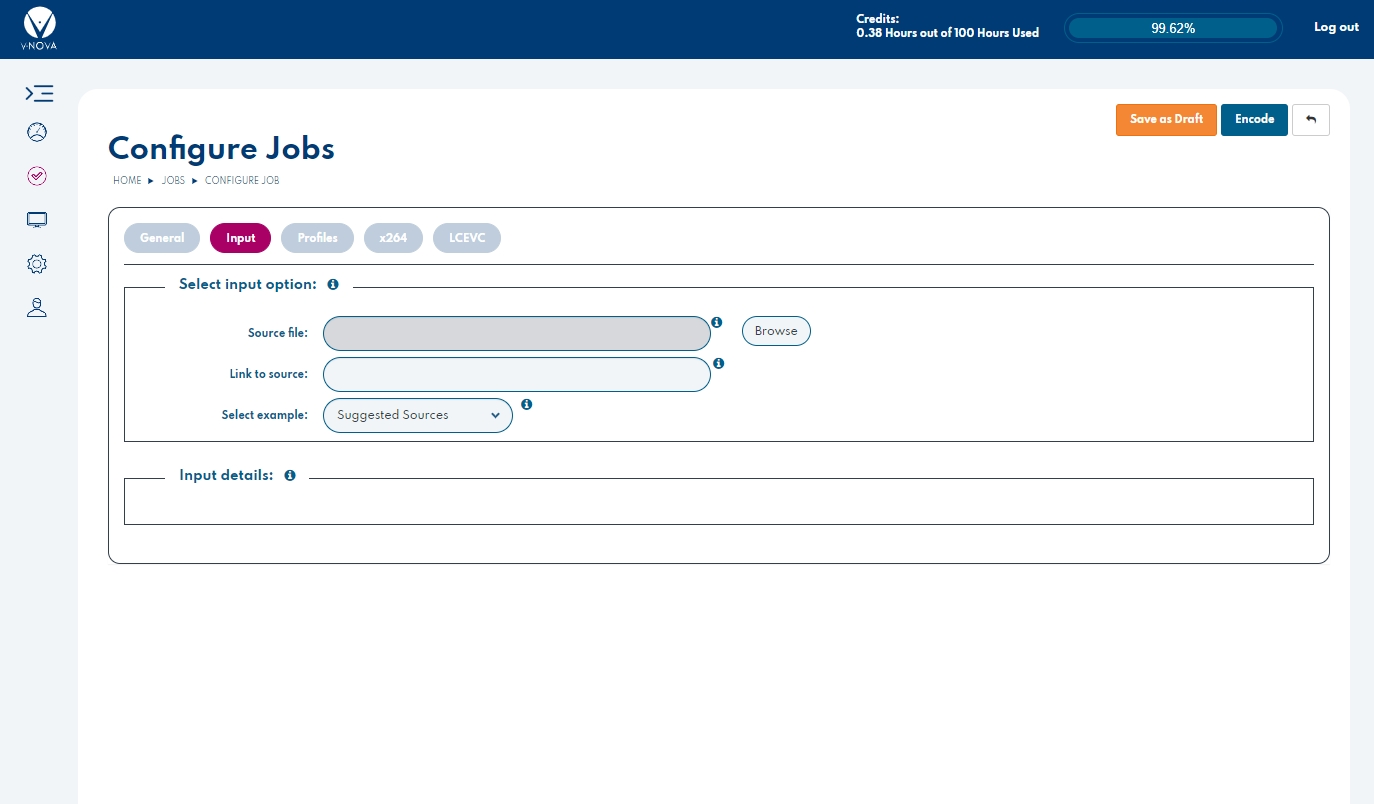
One can browse and upload a video source file in a range of supported formats, or provide a public link to the source asset (e.g. from an AWS S3 bucket)
Enter the source information for either of the fields:
Source File: Select a file to upload and encode from or,
Link to the Asset: Enter a publicly accessible link to the desired asset.
Select example: Ready to use demo sources.
Input File requirements:
File formats accepted: mp4, mov, mxf, avi, yuv*.
Source file size must be under 15GB**.
* requires advanced encoding options to be enabled on your account. ** Contact us to enable encoding from larger files.
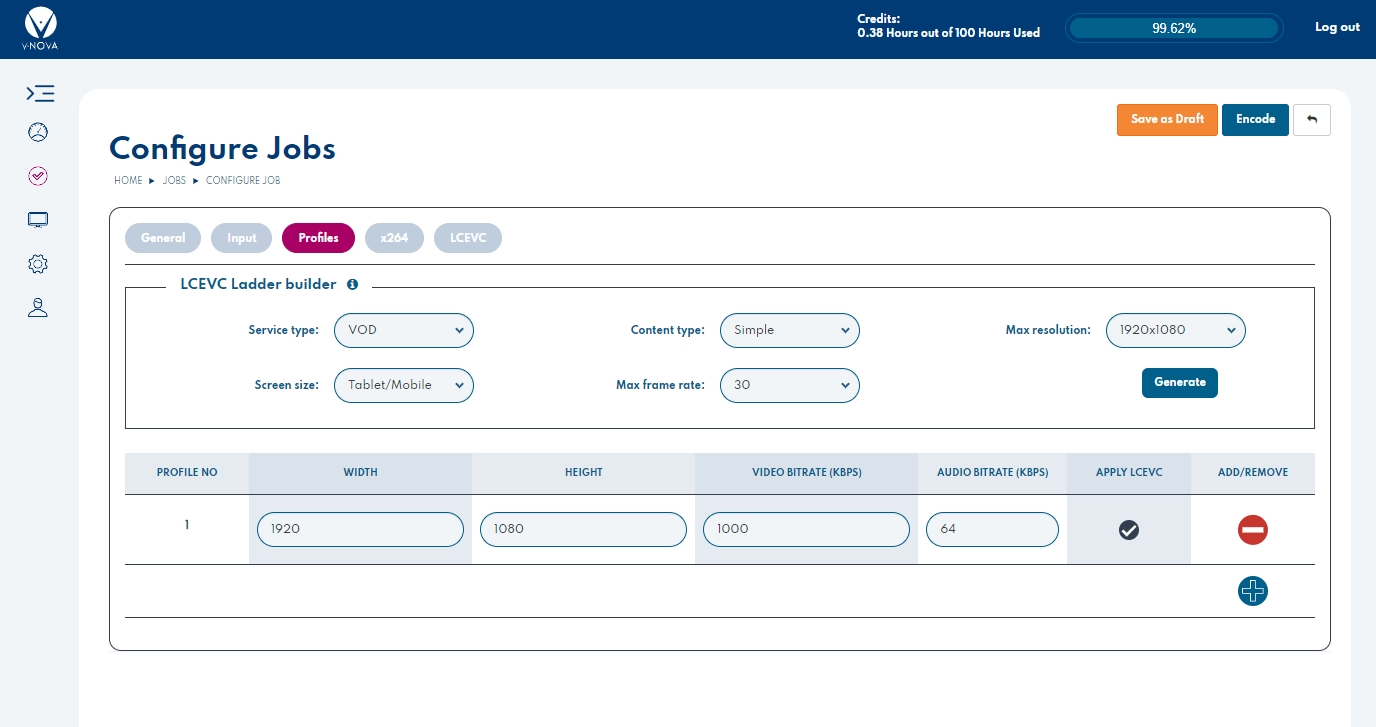
The Profiles tab is the place to define the encoding resolution & bitrate or CRF target, or use the LCEVC Ladder builder provided. Width, Height, Video bitrate or CRF and Audio Bitrate are mandatory fields.
Each Profile is part of the same adaptive streaming ladder, which is a range of different resolutions and bitrates that enable the player to dynamically adapt to the available internet bandwidth.
Upon selecting an existing preset, the encoding type and rate-control fields are automatically updated from the General tab.
A Profile includes the following settings:
Profile No: The number of the Profile assigned to the Preset's Profile. A Profile Number is assigned in the order in which the Profile is created.
Width: Width of the video, in pixels, set for the Profile which can be edited as required.
Height: Height of the video, in lines, set for the Profile which can be edited as required.
Video Bitrate: Video bitrate set for the Profile in kbps which can be edited as required.
Audio Bitrate: Audio Bitrate set for the Profile in kbps which can be edited as required.
Apply LCEVC:
If enabled, then LCEVC is applied to the profile.
If disabled, then LCEVC is not applied to the profile and it will use the base codec natively.
A new Profile can be added as follows:
Edit the Width, Height, Video Bitrate, Audio Bitrate fields, and enable or disable Apply LCEVC.
To remove a Profile:
The fields are described in the following sections.
To use the builder, enter the details from each drop down menu that best represent your use case and press generate, the tool will automatically generate all of the profiles.
Each Template provides typical recommended parameters to encode an asset. A template contains all of the settings associated with a job except for the source specific and its title. To select a built-in Template:
From the Template dropdown, select a option. The Profiles associated with the selected Templates are displayed:
Custom templates can also be saved at any time by selecting Save as template on the General tab for your job if you would like to recall those settings immediately for future jobs.
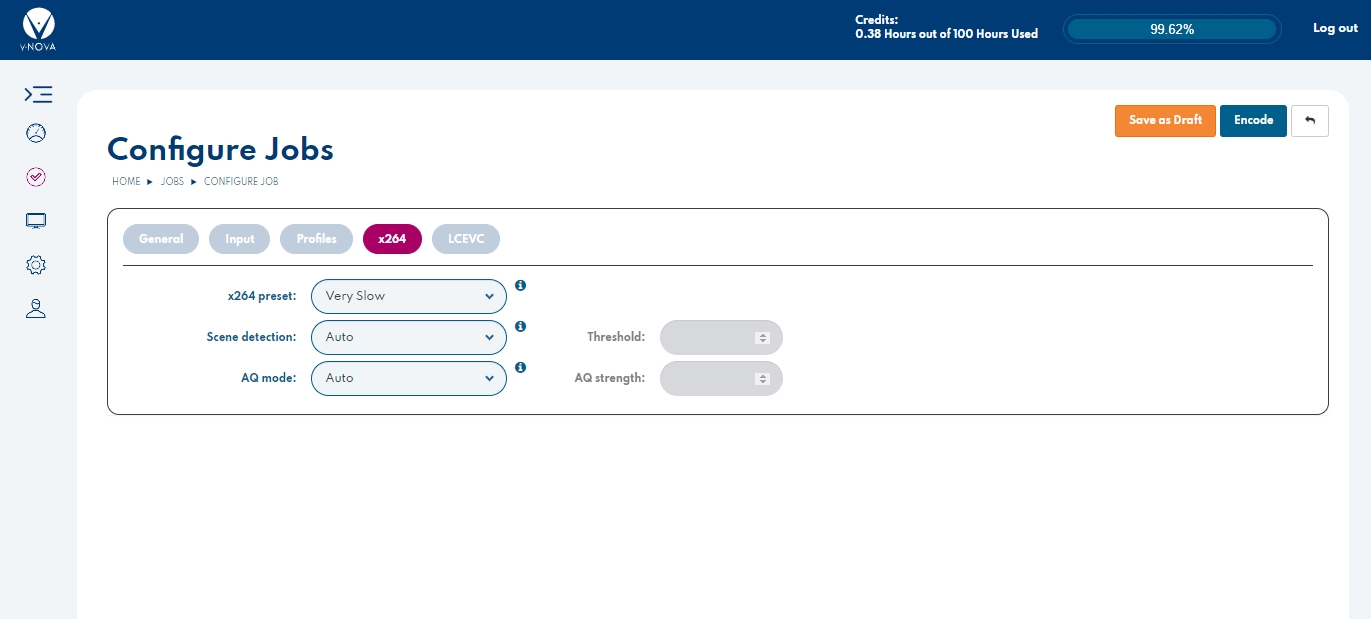
The tab title and given parameters will change depending on the base encoder selected in the General tab. Settings will be left in default if not specified by the Template or Ladder Builder.
This area in the UI enables adjustement of the common parameters for the base encoder that LCEVC is enhancing. If you require more please contact platform@v-nova.com to enable the advanced parameter tab.
This tab is to control the LCEVC tools. Tools are best left in default 'Auto'.
LCEVC settings
Video Quality
Animation
VMAF
SSIM
PSNR
0-5
Auto
2D: Force 2D scaling thoughout profiles
1D: Force 1D scaling throughout profiles
Transform Type
Auto: This setting is determined intelligently by the encoder based on the LCEVC Tune setting.
Double Directional
Directional
Modes:
Auto: Automatic M Adaptive Downsampling is applied.
Replace:
Seperate:
Off: Force off.
If Mode is set to Replace or Separate, then is grayed out.
If Mode is set to Replace or Separate, then Range: 0 - 0.5.
Apply dither
Auto: Automatic Dithering is applied and is dictated by the LCEVC tuning employed.
Force On: Dithering is determined by user-set Strength setting.
Strength
If Apply Dither is set to Auto, then Is grayed out.
If Apply Dither is set to Force On, then Range: 1 - 10.
This tab is avaliable to accounts or users upon request. Parameters should be entered as if raw into a FFmpeg command line. LCEVC's EIL parameters must have ';' after each one, including the final.
In the Add/Remove column, click the Add Profile icon . A new row is added, populated with the settings from the previous row, and assigned the next available Profile Number. Profile Numbers are not reused. If a Profile had been removed, then its number is no longer available. As such, the newly assigned number may skip one or more numbers.
Click the Remove Profile icon associated with the Profile that is to be removed.
The LCEVC ladder builder is based on extensive video quality analysis for a range of use cases and content types and aims to guide you to profile settings that will deliver strong results. It is important to change resolution and bitrate settings when adopting LCEVC enhancement to achieve the best results. Please refer to for further details.
: Set via spinner or direct entry.
To perform the Encode and view the resulting content, proceed to .


